Appwrite on Google Cloud
Deploy Appwrite on Google Cloud Compute Instance

Backend Sorcery & Finance Geeking
Appwrite is a self-hosted backend-as-a-service platform that provides developers with all the core APIs required to build any application.
Appwrite is a great one-stop solution for various things. I personally like Appwrite because of the self-hosting feature it provides. All it takes is 1 docker command and you get a complete backend system up and running in minutes.
In this post, I've discussed how to deploy Appwrite on Google Cloud.
Creating a Compute Engine VM
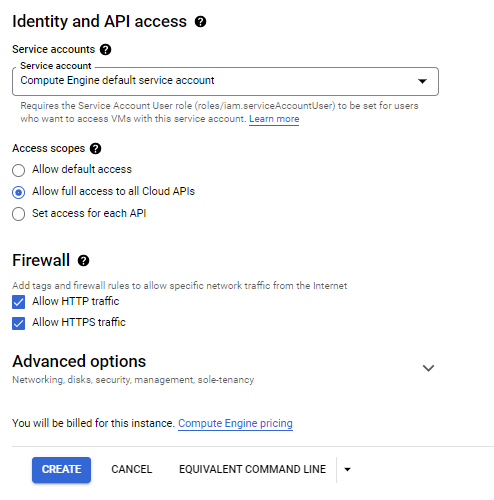
- Navigate to the Compute Engine Dashboard

Click on Create Instance

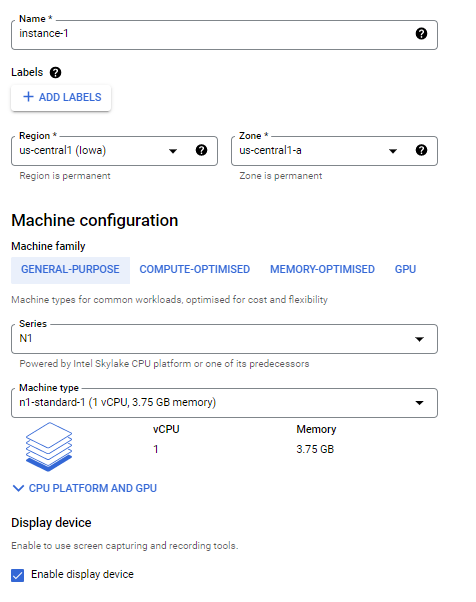
Creating Instance
Appwrite docs recommend using a machine with at least 1 CPU core and 2GB of RAM.
However, I tried using the
f1-micromachine type from theN1series which has1vCPU and 614MB memory, but the deployment took over 25 minutes to get online so it's not recommended to use this machine type.I ended up using the
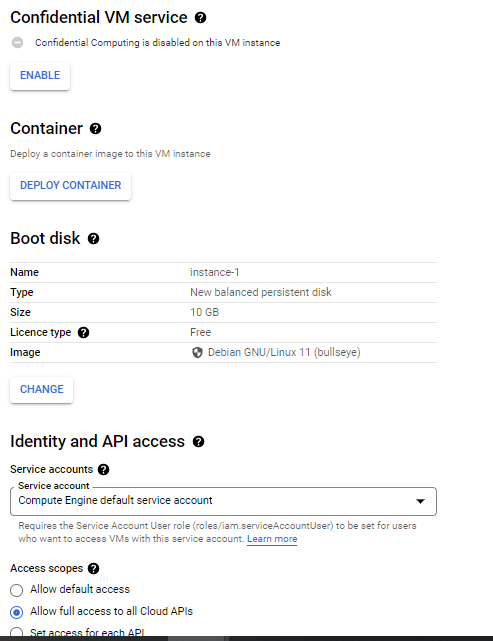
n1-standard-1machine type with1vCPU and 3.75GB memorywhich at the time of writing costs me US$25.27/month. It took 5mins for the containers to initialize and get online after all config was provided.While creating the instance, there's an option of deploying a container image to the VM instance, I specified the Appwrite image from DockerHub but after the VM was created, the image wasn't deployed.

tl;dr here's the shell command for creating the instance.
PS: If it gives an error, you can try all config in the browser console and copy the command and paste it into the cloud shell. Just scroll to the end and you'll see a copy command option.
gcloud compute instances create instance-1 --project={{PROJECT_ID_HERE}} --zone=us-central1-a --machine-type=n1-standard-1 --network-interface=network-tier=PREMIUM,subnet=default --maintenance-policy=MIGRATE --provisioning-model=STANDARD --service-account=230991838846-compute@developer.gserviceaccount.com --scopes=https://www.googleapis.com/auth/cloud-platform --tags=http-server,https-server --create-disk=auto-delete=yes,boot=yes,device-name=instance-1,image=projects/debian-cloud/global/images/debian-11-bullseye-v20221102,mode=rw,size=10,type=projects/{{PROJECT_ID_HERE}}/zones/us-central1-a/diskTypes/pd-balanced --no-shielded-secure-boot --shielded-vtpm --shielded-integrity-monitoring --reservation-affinity=anyFollowing is all the config I did for the VM
Connecting to the VM
The VM after creation will get an external IP address that will be used to access Appwrite from the web. To install Appwrite, we need to SSH into the VM. Google Cloud provides SSH from the browser. The option to connect via SSH is present in the VM dashboard

After clicking, a new window will open with the SSH connection established and a terminal view available.
It is recommended to get updates using
sudo apt-get update
sudo apt-get upgrade
Installing and Configuring Appwrite
Now that the VM is created, Appwrite can be installed on it.
Appwrite installs as docker containers and docker is mandatorily required. The VM by default has Debian 11. Follow the official Docker docs to install docker. I installed it using the following command
sudo apt-get install docker-ce docker-ce-cli containerd.io docker-compose-plugin
Note: You might need to add the docker repository into apt. Refer to the docs.
Finally, once docker is installed, Appwrite can be installed. It takes only 1 command to install it. It is recommended to read the Appwrite installation docs. To install Appwrite, run the following command
sudo docker run -it --rm \
    --volume /var/run/docker.sock:/var/run/docker.sock \
    --volume "$(pwd)"/appwrite:/usr/src/code/appwrite:rw \
    --entrypoint="install" \
    appwrite/appwrite:1.1.1
While installing, some configuration options are asked, and I've kept everything default. Customize as per your needs.
Once the values are provided, it'll take some time and then Appwrite will be installed.
The Appwrite dashboard can be accessed using the external IP of the VM which can be found in the VM's dashboard on Google Cloud Console. Enter the IP in your browser and the console will load. A privacy warning might be shown due to the self-signed SSL certificate, it's fine, you can click Advanced->Proceed to unsafe and visit the console.
Appwrite installs an SSL certificate so all communication is secure and encrypted. The certificate is self-signed so your browser doesn't trust it so the warning is shown.
If you've changed the default ports for HTTP (80) and HTTPS (443) while installing then your console might not load.
That's all, you now have your self-hosted backend system up and running on Google Cloud.